
As an Amazon Associate I earn from qualifying purchases. This article contains affiliate links that may earn a commission at no extra cost to you.
A stalled Can‑Am Outlander 450 often points to a weak battery—voltage must stay above 9.6 V during cranking. Check the electrical system by cleaning terminals and testing ground strap voltage drop, as anything over 0.1 V signals resistance. For fuel issues, replace the filter annually and verify proper pressure before deeper diagnostics. Belt tension needs 30–35 ft‑lb, while cooling requires a clean radiator and a 50/50 coolant mix.
Each fix includes specific numbers and intervals to restore reliable operation. Continue through the sections to find exact torque specs and step‑by‑step procedures.
Why Your Can‑Am Outlander 450 Won’t Start or Cranks Slowly
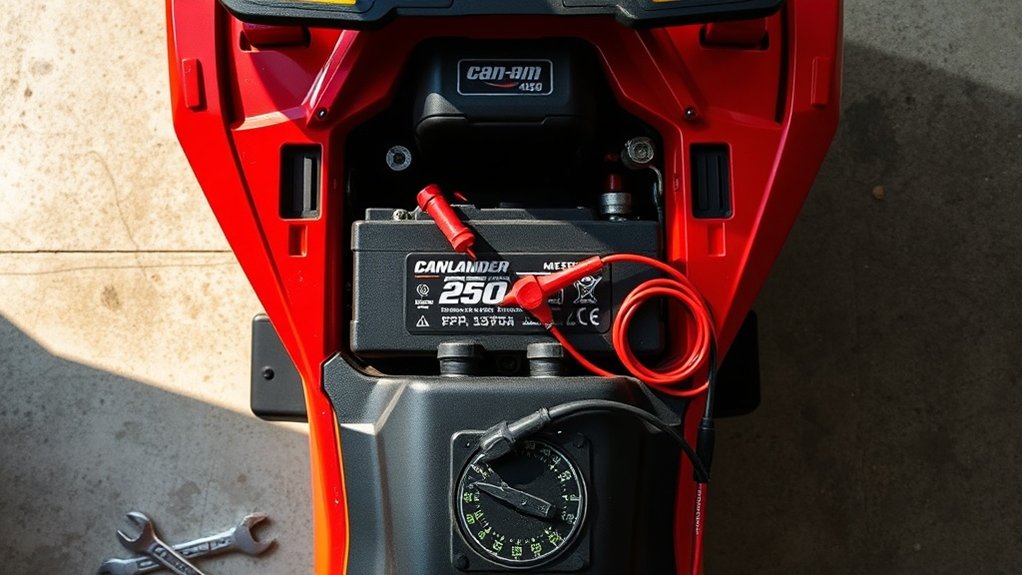
Diagnosing a no-start or slow-crank condition on a Can‑Am Outlander 450 begins with the battery, the single most common culprit.
Battery Basics and Beyond
A weak battery, measuring under 12.6 volts, prevents the starter from spinning freely. Corroded terminals disrupt power flow; clean them thoroughly and apply dielectric grease. Avoid a battery hydraulic bleed—a pressure release—by ensuring the vent tube is unblocked. Check the voltage under the seat cushion using a multimeter.
A battery that fails a load test, dropping below 9.6 volts during cranking, needs replacement. This step saves time and avoids misdiagnosing other components.
How to Get Your Electrical System Working Again
When electrical gremlins strike your Can‑Am Outlander 450, the first step is to verify the basics before diving into complex diagnostics. Begin with these three systematic checks:
- Power and Connections: Perform battery terminal cleaning with a wire brush, then apply dielectric grease. Test voltage drop across the main ground strap reinforcement points; anything over 0.1 volts indicates resistance.
- Wiring and Corrosion: Conduct a full wiring harness inspection, focusing on connector corrosion removal using electrical contact cleaner. Use circuit continuity check on suspect wires.
- Components: Execute relay testing with a multimeter for coil resistance (typically 70-100 ohms). Confirm fuse rating verification against spec sheet. Perform switch functionality assessment on ignition and kill switches.
Fuel System Fixes for Sputtering and Hard Starting
Why does a Can‑Am Outlander 450 sputter or refuse to start? Often, the fuel system is to blame. A clogged fuel filter restricts flow, causing hesitation under load—replace it annually or after 100 hours.
Dirty injectors may also cause hard starting or misfires; injector cleaning with a pressurized kit or professional service restores proper spray pattern and combustion. Always use fresh, high-octane fuel and a stabilizer. Inspect fuel lines for cracks and clear the tank vent. These steps resolve most fuel-related drivability issues without touching the belt or clutch.
Can‑Am Outlander 450 Belt and Clutch Repair Guide
A worn or misaligned belt often causes the Outlander 450 to lose power during acceleration or emit a high-pitched squeal.
To restore performance, follow these steps:
- Inspect belt torque: Verify the belt’s tension is within manufacturer spec, typically 30–35 ft-lbs, using a torque wrench; overtightening accelerates clutch wear.
- Check clutch wear: Examine the sheaves for grooves or glazing, which indicate excessive heat; replace worn components to prevent slipping.
- Clean debris: Remove accumulated dust from the clutch housing, as contamination reduces belt grip and causes premature failure.
These repairs guarantee smooth power delivery and extend drivetrain life.
Can‑Am Outlander 450 Overheating? Quick Cooling Fixes
After addressing belt and clutch issues to restore power delivery, the next common performance problem is overheating, which can arise from cooling system failures.
The first step involves checking the radiator for blockages, such as mud or debris, and cleaning it with compressed air or a soft brush.
Guarantee the radiator coolant is at the proper level, a 50/50 mix of distilled water and manufacturer‑approved antifreeze.
Next, test the fan relay by listening for the cooling fan activation when the engine reaches operating temperature; if silent, replace the relay.
A faulty thermostat may also cause overheating and requires replacement.
How to Fix Worn Shocks and Bent A-Arms for a Smoother Ride
Inspect the suspension components for visible damage, such as bent A‑arms or leaking shock absorbers, which directly cause a rough ride and uneven handling.
To restore a smoother ride, consider these targeted fixes:
- Replace bent A‑arms with heavy‑duty parts; even slight bends distort geometry, causing tire wear and instability during turns.
- Install a shock‑arm reinforcement kit to strengthen the mounting points, reducing flex and prolonging component life under rough terrain.
- Perform a shock‑absorber upgrade to premium units with adjustable damping, which better control rebound and compression for improved comfort and traction.
Always verify alignment after repairs, ensuring proper camber and toe settings.
What Spongy Brakes Mean and How to Fix Them
Several common issues can cause spongy brakes, and each points to a specific failure in the hydraulic system. Air trapped in the lines is the most frequent culprit; it compresses under pressure, ruining pedal feel. Contaminated brake fluid, which absorbs moisture over time, also degrades performance.
Diagnosing and Bleeding the System
Begin by checking the master cylinder reservoir; top off with fresh DOT 4 brake fluid if low.
Then, bleed each caliper using a wrench and tubing, starting at the farthest wheel from the master cylinder.
Repeat this process until firm pedal feel returns and no air bubbles exit. Regular fluid changes prevent future sponginess.
Uneven Wear and Bent Rims: Restore Tire and Wheel Performance
Uneven wear and bent rims compromise both ride quality and safety. Restoring performance requires a systematic approach.
- Correct tire pressure and wheel alignment. Maintain manufacturer-recommended tire pressure, typically between 5–7 psi for the Outlander 450, to prevent edge wear. Misalignment causes scalloped tread; adjust toe-in to 0–3 mm for straight tracking.
- Perform rim straightening and replace damaged wheels. Slight bends can be corrected with a hydraulic press, but cracks or severe warping demand replacement. Always torque wheel bolts to 35–40 ft-lbs.
- Complete tire balancing after repairs. Unbalanced tires create vibration that accelerates wear. Use static balancing beads or weights to guarantee smooth rotation.
Exhaust Leaks and Loud Rumbling: How to Seal Them
Why does a loud rumbling or hissing sound emerge from the exhaust system, often accompanied by a drop in engine performance? This indicates an exhaust leak, typically from a damaged gasket, cracked manifold, or corroded muffler. Leaks disrupt backpressure, reducing power and fuel efficiency.
Locating and Sealing the Leak
Start the engine and feel for escaping gas along joints.
Common failure points include header connections and the muffler seam.
For small cracks, apply high-temperature exhaust insulation wrap or sealant.
For larger damage, muffler repair may involve welding or full replacement.
Always allow the system to cool before working, and tighten all clamps to manufacturer torque specs to prevent recurrence.
Weekly Checks to Prevent Can‑Am Outlander 450 Breakdowns
What weekly checks can prevent a Can‑Am Outlander 450 from breaking down unexpectedly? A thorough owner inspection of key systems guarantees reliability and catches minor issues before they escalate.
- Fluid & Battery Health: Perform a coolant check and inspect the brake fluid level, making sure both are within specified ranges. Verify battery health with a voltmeter; a reading below 12.6 volts indicates a need for charge or replacement. Schedule a regular oil change and coolant flush per the manual to prevent wear and overheating.
- Tires & Drivetrain: Confirm tire pressure is at the manufacturer’s recommendation. Examine chain tension, adjusting it to allow 1-1.5 inches of slack. This prevents drivetrain strain and premature failure.
- Brakes & Ignition: Inspect brake pad wear, replacing pads when thickness falls below 1/8 inch. Perform a spark plug inspection, replacing it if fouled or gapped incorrectly.
can am outlander 450 shop manual
The full service manual walks through every fix in this guide. See today’s price.
Frequently Asked Questions
How Often Should I Change My Atv’s Transmission Fluid?
Transmission fluid should be changed per the manufacturer’s fluid change schedule, typically every 100 hours or annually. Following the specified fluid viscosity for transmission replacement schedule guarantees ideal clutch and gear performance.
What Type of Coolant Is Best for the Outlander 450?
The Outlander 450 requires a 50/50 mix of ethylene glycol coolant. A suitable coolant brand is Prestone; using the correct coolant type prevents overheating and corrosion.
Can I Replace a Blown Fuse With a Higher Amperage?
Replacing a blown fuse with a higher amperage is not recommended. This bypasses the fuse rating and compromises electrical safety, risking damage to wiring and components. Always use the specified amperage.
How Do I Properly Store My ATV for Winter?
Store the ATV with a full tank of stabilized fuel, remove the winter battery to a trickle charger, and elevate the machine on blocks. Clean the vehicle thoroughly, treat tire storage by overinflating slightly, and protect from moisture and rodents.
What Causes My ATV to Backfire When Decelerating?
Backfiring during deceleration is often caused by an incorrect fuel mixture, making it too rich or lean, or by improper exhaust timing. Damaged exhaust components can also disrupt system pressure.

