
The Honda Pioneer 1000’s most common issues include transmission problems like delayed gear engagement and grinding, engine troubles such as hard starting and excessive oil consumption, electrical system failures from corroded connections, brake system wear requiring pad replacement every 5,000-7,000 miles, clutch system concerns affecting power delivery, and fuel system complications involving pump failures around 2,000-3,000 miles. You’ll want to implement a strict maintenance schedule including fluid changes every 600 miles to prevent these problems from escalating into major repairs.
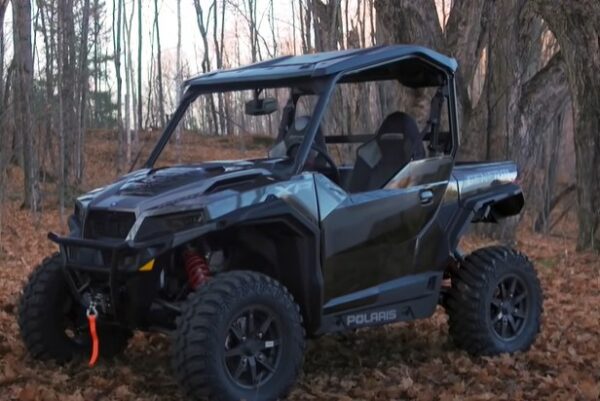
Understanding the Honda Pioneer 1000 Design
Before diving into specific problems with the Honda Pioneer 1000, you’ll need to understand the fundamental design of this versatile utility terrain vehicle (UTV).
The Pioneer features a powerful 999cc twin-cylinder engine that delivers robust performance for both work and recreation, paired with a sophisticated transmission system that offers both automatic and manual shifting modes.
The Honda Pioneer’s core design centers on durability and functionality, with key components strategically placed for optimal weight distribution and handling.
You’ll find the engine mounted low in the frame to maintain a stable center of gravity, while the transmission positioning allows for quick maintenance access.
The vehicle’s performance capabilities stem from its integrated design elements, including a fully-independent suspension system, precise steering geometry, and specialized drive modes that adapt to various terrain conditions.
These engineering choices create a balanced platform that’s capable of handling demanding tasks while providing reliable everyday operation.
Transmission and Gear Shifting Problems
While the Honda Pioneer 1000’s transmission system offers innovative dual-mode functionality, owners frequently report specific shifting issues that can impact performance and reliability.
The DCT (dual clutch transmission) system, though advanced in design, can experience complications that affect your vehicle’s operation, particularly when switching between automatic and manual modes or during heavy trail use.
Common transmission and gear shifting problems you’ll need to watch for include:
- Delayed engagement when shifting between forward and reverse, often accompanied by a grinding noise in the gearbox.
- Transmission getting stuck in neutral or failing to properly engage the selected gear, especially after extended periods of operation.
- Shifter mechanism becoming stiff or unresponsive, requiring excessive force to change gears.
You can prevent many of these issues through regular maintenance of the DCT system, including fluid changes every 600 miles and proper warm-up procedures before operation.
When problems persist, professional diagnosis is recommended to protect your transmission’s longevity.
Engine Performance Issues
The Honda Pioneer 1000’s engine problems can be just as concerning as transmission issues, with owners reporting several performance-related challenges that affect power delivery and reliability.
You’ll often notice hard starting issues, especially in cold weather, which can stem from worn spark plugs or fuel injector clogs that prevent proper combustion. If your engine’s struggling to turn over, you’ll need to check the ignition system and ensure your spark plugs aren’t fouled or gapped incorrectly.
Oil consumption can also become problematic, with some owners reporting their engines burning through oil faster than expected. You should monitor your oil levels regularly and watch for any unusual exhaust smoke, which might indicate internal engine wear.
To prevent these issues, maintain strict service intervals, use high-quality fuel, and keep your fuel injectors clean. If you’re experiencing rough idling or power loss, consider having a professional diagnose potential combustion chamber deposits or fuel system restrictions.
Electrical System Complications
Owners of the Honda Pioneer 1000 often encounter frustrating electrical system problems that can affect multiple vehicle functions at once. The most common electrical gremlins stem from corroded connections and bad contacts throughout the UTV’s wiring system, particularly in areas exposed to moisture and dirt.
You’ll want to regularly inspect and clean all electrical connections to prevent these issues from developing.
Common electrical system problems include:
- Start button failures due to internal switch wear or contamination, requiring either cleaning or complete replacement
- Battery drain issues caused by loose terminals or faulty ground connections, leading to difficult cold starts
- Intermittent electrical failures across multiple systems due to damaged wire harnesses or corroded connectors
When troubleshooting these issues, you’ll need to systematically check each connection point with a multimeter, paying special attention to ground wires and main power connections.
Applying dielectric grease to connections can help prevent future corrosion and maintain reliable electrical performance.
Brake System Failures and Solutions
Since proper brake maintenance directly impacts rider safety, understanding common brake system failures on the Honda Pioneer 1000 remains crucial for responsible UTV ownership.
You’ll need to regularly troubleshoot issues like squealing brakes, reduced stopping power, and uneven brake wear to prevent serious problems from developing.
The most common problems include worn brake pads, which typically need replacement every 5,000-7,000 miles, depending on your riding conditions.
If you’re experiencing a spongy brake pedal, you’ll need to check for air in the lines or potential fluid leaks that require immediate attention.
Regular maintenance should include inspecting your brake fluid levels every 300 miles, checking pad thickness monthly, and testing brake response before each ride.
When repairs become necessary, always use OEM parts or high-quality aftermarket components to ensure optimal performance.
For major brake system issues, you’ll want to consult a certified Honda mechanic to diagnose and fix complex problems properly.
Clutch System Concerns
While brake system maintenance helps prevent accidents, malfunctioning clutch components can leave you stranded on the trail. The Honda Pioneer 1000’s clutch system requires regular inspection and maintenance to ensure optimal power transfer from the engine to the drive shaft.
When clutch problems arise, you’ll notice decreased performance, unusual noises, or complete power loss during operation.
Common clutch-related issues you might encounter:
- Belt slippage due to worn clutch shoes, resulting in reduced power delivery and acceleration
- Drive clutch sticking from debris accumulation, causing engagement problems at varying speeds
- Broken or damaged clutch springs, leading to inconsistent shifting and potential transmission damage
To prevent these problems, perform regular maintenance checks every 100 hours of operation.
You’ll want to inspect the clutch belt for wear, clean the clutch housing of debris, and verify proper alignment between primary and secondary clutch components.
If you notice any grinding sounds or burning smells, schedule immediate service.
Power Steering Difficulties
Despite the Honda Pioneer 1000’s reputation for reliability, power steering problems can develop over time, leading to difficult handling and reduced control during operation.
You’ll notice symptoms like stiff steering, unusual noises when turning, or inconsistent power assist, which often stem from worn bearings or deteriorating joints in the steering system.
To prevent steering issues, you’ll need to stick to your maintenance schedule and regularly check the power steering fluid levels.
When the fluid becomes contaminated or low, it can cause damage to critical components and compromise the seals.
Make sure you’re inspecting the steering system during routine maintenance, paying special attention to signs of fluid leaks around connection points.
If you experience steering problems, don’t wait to address them.
Check the power steering pump, inspect all joints for excessive play, and ensure all mounting bolts are properly torqued.
Early intervention can prevent more extensive damage and costly repairs down the line.
Fuel System Troubles
Three common fuel system troubles plague the Honda Pioneer 1000, including clogged fuel injectors, failing fuel pumps, and contaminated fuel filters that can severely impact performance.
You’ll notice these issues through symptoms like rough idling, decreased power output, and inconsistent acceleration when operating your UTV.
- Fuel pump failures typically occur between 2,000-3,000 miles, causing hard starting and potential stalling due to inadequate fuel pressure in the system.
- Clogged injectors lead to incomplete combustion, resulting in poor fuel economy and reduced engine performance that’s especially noticeable during acceleration.
- Contaminated fuel filters, often caused by low-quality fuel or debris in the tank, restrict proper fuel flow and create erratic engine behavior.
To prevent these common issues, you’ll want to use high-quality fuel, replace your fuel filter every 1,000 miles, and listen for any unusual pump sounds that might indicate early system problems.
Regular Maintenance Requirements
To keep your Honda Pioneer 1000 running smoothly, following a strict maintenance schedule remains essential for preventing costly repairs and maintaining optimal performance.
While this vehicle features a proven engine design, you’ll need to perform regular maintenance to avoid frequent problems that can develop over time.
Your maintenance checklist should include checking the oil pump every 600 miles, replacing the air filter every 15-20 operating hours in normal conditions, and inspecting fluid levels weekly.
You’ll find detailed service intervals in your owner’s manual, which you should keep handy for reference. The manual outlines specific procedures for belt inspection, valve adjustments, and transmission servicing.
Don’t skip these routine tasks: changing the oil every 1,000 miles, lubricating drive components every 300 miles, and cleaning the air intake system monthly.
These preventive measures will help maintain your Pioneer’s reliability and extend its service life significantly.
Owner Reviews and Experiences
Real-world feedback from Pioneer 1000 owners reveals both satisfaction and recurring issues with this popular UTV model. When surveying common Honda Pioneer experiences, you’ll find that most owners report reliable performance when proper maintenance schedules are followed, though some have encountered costly repairs over time.
Your likelihood of experiencing problems often depends on several key factors:
- Operating conditions – frequent mud and water exposure increases damage risk
- Maintenance adherence – skipping scheduled service leads to more likely issues
- Usage patterns – heavy hauling and aggressive driving accelerate wear
If you’re considering a Pioneer 1000 purchase, understand that most owners report positive experiences despite occasional setbacks. The most satisfied owners are those who perform regular inspections, address minor issues before they become major problems, and budget for potential repairs.
While some have faced transmission or electrical challenges, these typically aren’t widespread enough to overshadow the model’s overall reliability ratings.
Essential Preventive Measures
Maintaining your Honda Pioneer 1000 through preventive measures can dramatically reduce the likelihood of major mechanical failures and costly repairs.
You’ll need to establish a regular maintenance schedule that includes checking critical components like ball joints, axle boots, and suspension parts every 500 miles.
Inspect your shock absorbers for signs of leakage or unusual wear, and test the suspension’s compression by applying weight to each corner of the vehicle.
If you notice uneven tire wear or unusual noises during rides, it’s time to examine your suspension components more closely.
You should also regularly clean and lubricate all moving parts, paying special attention to ball joints and bushings.
Keep detailed maintenance records and don’t skip scheduled service intervals.
Check your owner’s manual for specific maintenance requirements, and always address small issues before they develop into major problems that could affect your vehicle’s performance or safety.
FAQ’s for Honda Pioneer 1000 problems:
Q1: What is the price for repairing typical issues with the Honda Pioneer 1000?
An oil change typically costs around $50, while other repairs such as clutch system replacement can set you back several hundred dollars. The cost of repairs can vary depending on the specific issue and the necessary repairs.
Q2: Where can I purchase spare parts for a Honda Pioneer 1000?
Replacement parts for any brand of ATV, UTV, or SXS model are readily available at Honda dealerships. Alternatively, you can explore the convenience of purchasing genuine OEM parts for the Honda Pioneer 1000 online.
Notable online platforms specializing in the sale of authentic Honda parts include Amazon, Partzilla.com, Bike Bandit, and Rocky Mountain ATV/MC. Many of these websites even offer free shipping for orders exceeding a certain threshold.
Q3: Is it possible to fix the typical problems of the Honda Pioneer 1000 on my own?
While you can easily address issues caused by dirty oil or a clogged air filter, tasks such as changing spark plugs or repairing brakes require expertise and should be entrusted to a skilled mechanic. It is crucial to consult your owner’s manual for precise instructions on any repairs you intend to undertake yourself.
Additionally, keeping spare parts like oil, filters, and spark plugs readily available is a wise practice as it can save you valuable time in case of an emergency.